Summary and Other Considerations About Rendering
Reading time: 5 mins.Summary
We will not reiterate what has already been discussed in previous chapters. Instead, let's summarize the essential terms and concepts from this lesson:
-
Computers process discrete structures, presenting a challenge for representing the continuous shapes desired in images.
-
The triangle serves as an effective rendering primitive for both ray tracing and rasterization methods when addressing the visibility problem.
-
Rasterization offers quicker visibility processing compared to ray tracing and is the preferred method for GPUs. However, ray tracing excels in simulating global illumination effects and can handle both visibility and shading issues. Using rasterization for global illumination requires additional algorithms or methods.
-
Despite its advantages, ray tracing faces challenges such as costly ray-geometry intersection tests and increased render time proportional to scene complexity. Acceleration structures can reduce render time, though finding an optimal structure for all scene configurations is difficult. Ray tracing also introduces noise, a challenging visual artifact to eliminate.
-
For ray tracing to effectively compute shading and simulate global illumination effects, it must simulate the varied paths light rays take from sources to the observer, influenced by the surface type (diffuse, specular, transparent, etc.). Accurate simulation of these paths is crucial for replicating lighting effects like diffuse and specular inter-reflections, caustics, soft shadows, and translucency. An efficient light transport algorithm simulates all possible light paths.
-
Simulating light's interaction with matter at the micro- and atomic scale is unfeasible, yet the outcomes of these interactions are predictable and consistent. Thus, mathematical functions are used to simulate these interactions. Shaders utilize mathematical models to approximate how a surface reflects light, defining the visual identity of objects and enabling the simulation of various materials' appearances for photo-realistic imagery. Shaders play a pivotal role in this process.
-
The distinction between shaders and light transport algorithms is subtle. The spawning of secondary rays for indirect lighting effects, dependent on material type (diffuse, specular, etc.), illustrates the interaction between shaders and light transport. The upcoming section on light transport will further explore how shaders contribute to generating these secondary rays.
One of the aspects not discussed in previous chapters is the difference between rendering on the CPU versus the GPU. It's crucial not to equate the GPU exclusively with real-time rendering nor the CPU with offline rendering. Real-time and offline rendering each have precise meanings unrelated to the CPU or GPU. We refer to real-time rendering when a scene is rendered at 24 to 120 frames per second (fps), with 24 to 30 fps being the minimum to create the illusion of movement. A typical video game runs at about 60 fps. Rates below 24 fps and above 1 fps are considered interactive rendering. When rendering a frame takes from a few seconds up to minutes or hours, it falls under offline rendering. Achieving interactive or even real-time frame rates on the CPU is entirely feasible. The rendering time primarily depends on the scene's complexity. Even on the GPU, a highly complex scene may require more than a few seconds to render. Our point is that the association between GPU with real-time and CPU with offline rendering is a misconception. In this section's lessons, we will explore using OpenGL for GPU image rendering and implement both rasterization and ray-tracing algorithms on the CPU. A dedicated lesson will cover the advantages and disadvantages of GPU versus CPU rendering.
Another topic we will not cover in this section is the relationship between rendering and signal processing. Understanding this relationship is crucial but requires a solid foundation in signal processing, including Fourier analysis. We plan to introduce a series of lessons on these topics once we complete the basic section. Without a thorough understanding of the underlying theory, discussing this aspect of rendering might lead to confusion rather than clarity.

With these concepts reviewed, you now have a preview of what to expect in the sections dedicated to rendering, especially those on light transport, ray tracing, and shading. The light transport section will discuss simulating global illumination effects. The ray-tracing section will delve into specific techniques like acceleration structures and ray differentials (it's okay if you're unfamiliar with these terms for now). In the shading section, we'll explore shaders and the mathematical models developed to simulate various material appearances.
We will also address engineering topics such as multi-threading, multi-processing, and utilizing hardware to accelerate rendering.
Most importantly, for those new to rendering, we recommend starting with the upcoming lessons in this section to grasp the fundamental and essential rendering techniques:
-
Understanding perspective and orthographic projections, including using the perspective projection matrix to project points onto a "virtual canvas" for creating 3D object images.
-
The workings of ray tracing and ray generation from the camera to create an image.
-
Calculating the intersection of a ray with a triangle.
-
Rendering complex shapes beyond simple triangles, including spheres, disks, planes, etc.
-
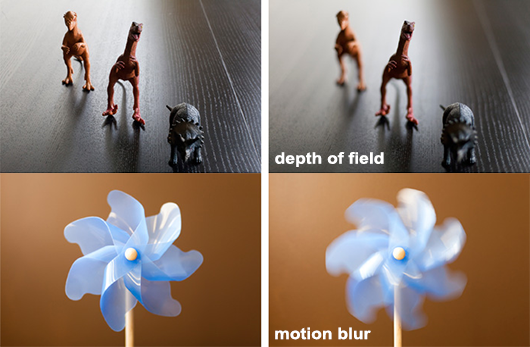
Simulating motion blur and optical effects like depth of field.
-
Learning about the rasterization algorithm.
-
Exploring shaders, Monte-Carlo ray tracing, and texturing. Texturing involves adding surface details to objects, using either image-based textures or procedural generation.
Ready to begin?